

I’m an advocate of self-responsibility and self-care. Personally I’ve never understood why anyone would find baking or cooking demeaning, I’m very proud of my baking and cooking skills. They help me take care of myself and my loved ones.
Suffice to say, I do thoroughly enjoy cooking when I get time, it’s satisfying in many ways.
Today I want to share what I’ve learn’t about bread. It’s a collection of what I’ve learnt over the years, through trial and error, and some hard experience. First I’m covering the pre-requisite knowledge of the hows/whats/whys, then the general method of baking bread in 4 steps. And lastly a quick, tried and tested way to make bread without an oven 😀
Baking bread is pretty easy once you know how to do it, and understand what’s going on with the ingredients and why they are in your bread. Practice will make perfect – repetition is they say the mother of skill.
A “complete” bakers guide, this is definitely not – if you want that, then spend some of your money on a book, or give your Googling skills a polish, there’s plenty of cookery/baking blogs out there …
Aside – polish reminds me of the “Polish Sherry” from the TV series “One Foot In The Grave”, confusion over Polish as in Poland and polish as in to make shine … got to love the ambiguity of the English language ! … oh and the “Cop Porn” … again Google it if you want to be enlightened 😀
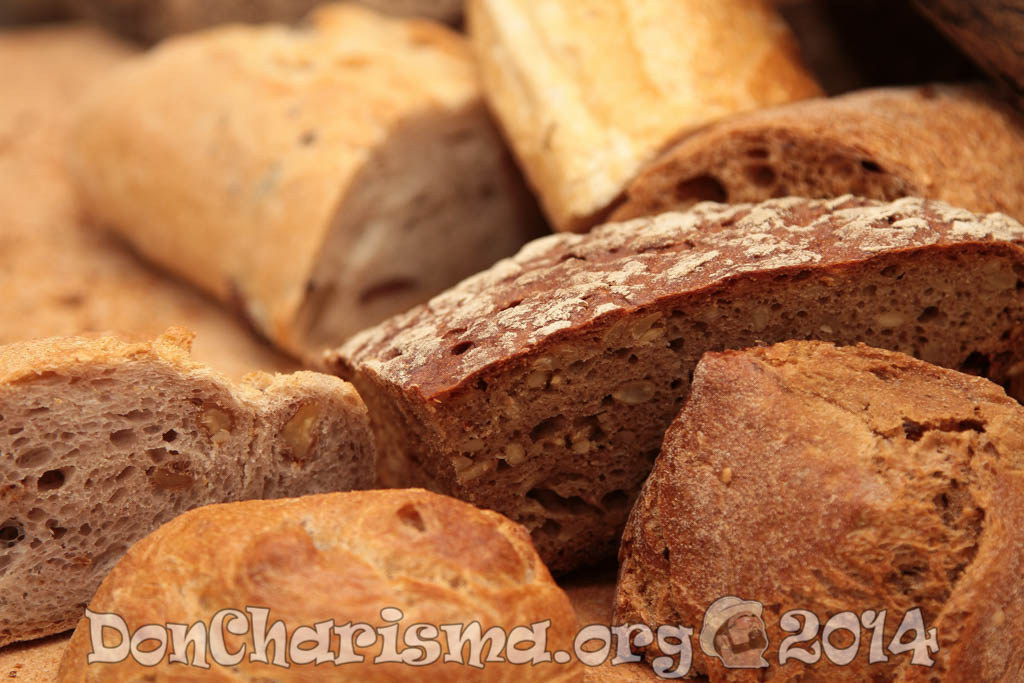
What is bread ?
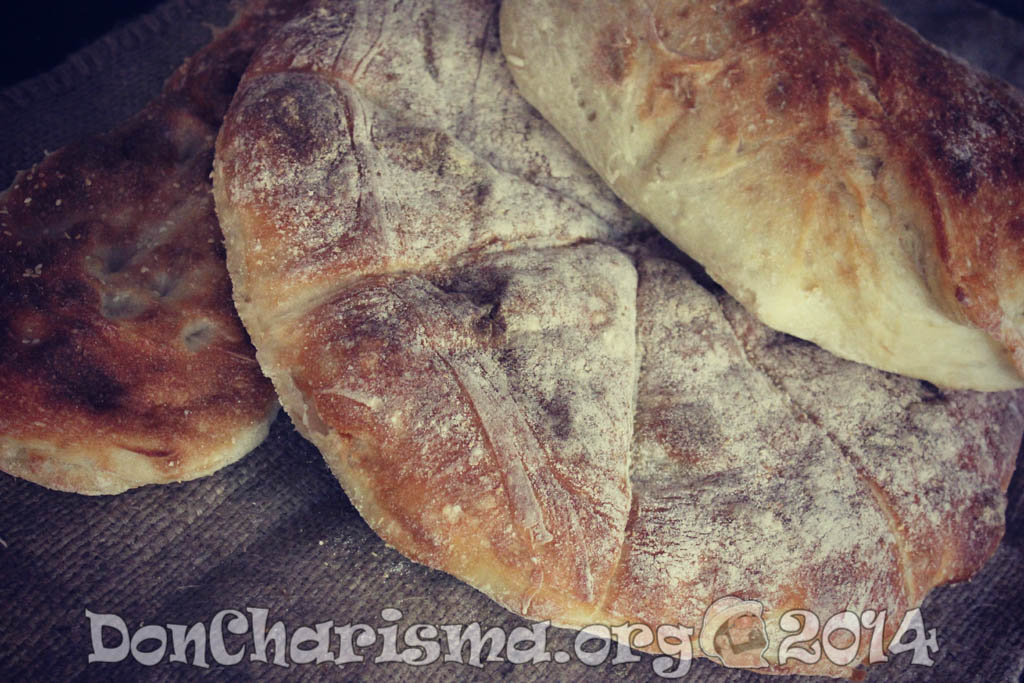
Bread in it’s most BASIC form is (usually wheat) flour mixed with water, which is then cooked aka “baked”, usually in an oven to make bread.
Wheat And Flour
Wheat is a grain, amongst which there are many others – barley, oats, rye etc. Wheat I’m guessing was originally a grassy type of plant found in the wild, which was selectively grown to produce higher and higher yielding strains, leading to the wheat we have today. Wheat is also ancient. For thousands of years people have been eating wheat, a staple in the diets of millions, in many countries. Wheat is ground (or milled), these days by commercial grinding machines, historically it was ground with things as primitive as grinding between two stones. The grinding or milling produces a powder called flour.
Pre-electricity and the internal combustion engine, the power to grind or mill the flour was often captured from either water or wind power, hence the “wind-mill” and “water-mill”.
The basic grinding process produces whole wheat flour, it has to be processed further to produce white flour, bran and the wheat “germ” are removed in this process.
Types Of Flour
There are different types of flour that are used for varying culinary purposes. “All purpose” flour is a middle of the road flour, and suited at a push to most cooking and baking purposes – bread, cakes, pancakes, muffins, sauces etc. Then we have the “strong” or “bread” flour, it’s called strong because of it’s (high) gluten content, which gives the bread it’s bready texture instead of a more cakey type of texture. Then we have a “weak” or “soft” flour which cooks with a more cakey texture. It contains the least gluten, and you guessed it, would be used for making cakes, and pastry.
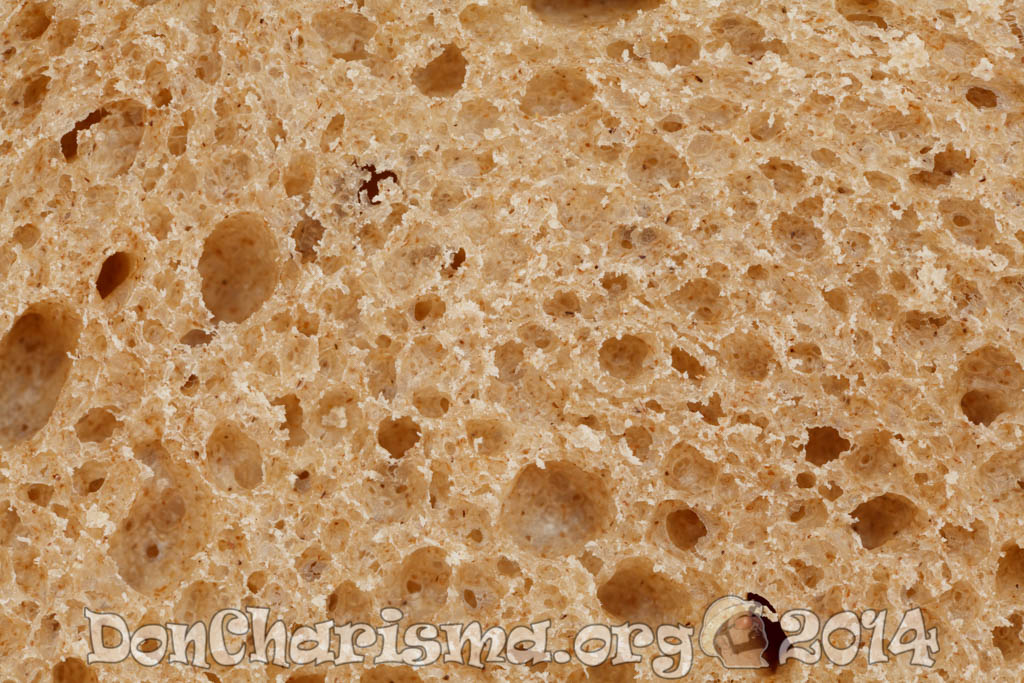
Gluten Is Important In Making Bread !
Gluten is an important factor in baking bread. Flours with more gluten will generally produce more agreeable to eat breads. The gluten plays two roles, one is in forming the texture and structure of the finished bread, and the other is forming air pockets that the yeast or other raising agent can “put” air into, for a “lighter” and perhaps “crisper” bread. Italian pizza base flour would probably have the highest of gluten contents (as Italian pizza bases are often VERY light and crispy).
Raising Agents
Bread can be cooked “flat” without a raising agent, but generally “unleavened” bread is not as palatable as it’s risen counterpart. The two main raising agents that I’m aware of in bread making are yeast and “baking power”/”baking soda”.
Baking soda/powder is more commonly used in things like cakes, and a particular type of bread called “soda bread”. It can be used in bread making, but as bread is usually savoury some may not enjoy the “flavour” the baking soda lends to the bread. The soda taste isn’t so noticeable in things like cakes, because the sweetness tends to mask it.
Yeast is the more commonly used raising agent in bread. There are different types of yeasts used in bread making. The difference is primarily in the speed at which the yeast acts to form the bubbles which give bread it’s delightful light texture. Fast acting yeasts can be bought from supermarkets and other shops that sell baking supplies. The same shops/stores often sell slower acting yeasts which will mean the bread making process take longer. Exact flavour varies slightly from yeast to yeast.
Fast acting yeasts tend to be added with the dry ingredients of the bread and is a fine almost powder consistency. Slower acting yeasts may need to be “activated” by mixing with warm water and sugar and left to stand whilst the yeast “wakes up”. Slower acting yeasts I’ve seen in a block with a consistency similar to butter, and also in dried form in tiny pellets. Hopefully you’ll have instructions on your yeast’s container, or ask where you bought it if there isn’t any instructions !
Sour dour yeast is an alternative. Anyone who’s ever tasted sourdough bread will attest to it’s much more “interesting” flavour and agreeably chewy texture. Sour dough yeast is cultivated by the baker, simply by using the baking flour itself mixed with water, and “growing” the naturally occurring yeasts. It takes several days to cultivate a “starter” or “culture”, but once cultivated the sour dough culture can be “fed” and used for baking indefinitely, free yeast essentially. The downside with sourdough is that it increases the time taken to make bread, because it acts slower than the off the shelf yeasts. It also needs a little tender love and care, in the form of day-to-day maintenance, which some may not have the time or patience for.
Sour dough starter/culture isn’t a secret of professional bakers, it can be made at home by “amateur” bakers like you and I. Google has plenty of guides from across the internet, so check there if you want to know more.
To note is that most yeasts usually call for a small amount of sugar in the dough to work effectively. Yeasts will “eat” the starch in the flour, but slowly, they will eat the sugar quicker, so bakers usually add a small amount of sugar in the dough to “feed” the yeast.
Flour Improvers
Flour can be “improved” by adding agents, the most basic of which is salt. Salt may just be a flavour improver, personally I’m not convinced that it makes any difference to the texture and consistency of the bread. Another basic improver would be milk. A recipe that I looked at recently for Indian Naan bread reveals that they use milk in this bread. Naan bread also uses sugar, another flavour enhancer (and also feeds the yeast, if used). Sugar should be used sparingly in bread, as bread is generally a savoury not a sweet.
Oil is often used in bread as an improving agent. Olive oil will for instance lend it’s delicate flavour to the bread, and may improve the bake.
Flavouring Bread
Bread can be flavoured with many types of ingredients, and “enhancers”, we already mentioned Olive oil. Sliced olives, chopped sun-dried tomatoes, chopped garlic all could be added to the bread “dough” prior to cooking, for an extra something in flavour-wise. Caraway seeds lend a very distinctive taste to bread, very highly recommended to try them in baking !
Or perhaps you’d like some grated cheese in the mix, cheeses go well in bread making for cheese lovers.
The combinations and flavours are in fact only limited by the ingredients you have to hand, and your imagination 😀
With the caveat not to “overload” your dough with ingredients, you may find it doesn’t bake as well with too much extras in the bread.
Making Bread
Ok, so enough of the foreplay, what’s involved in making bread ?
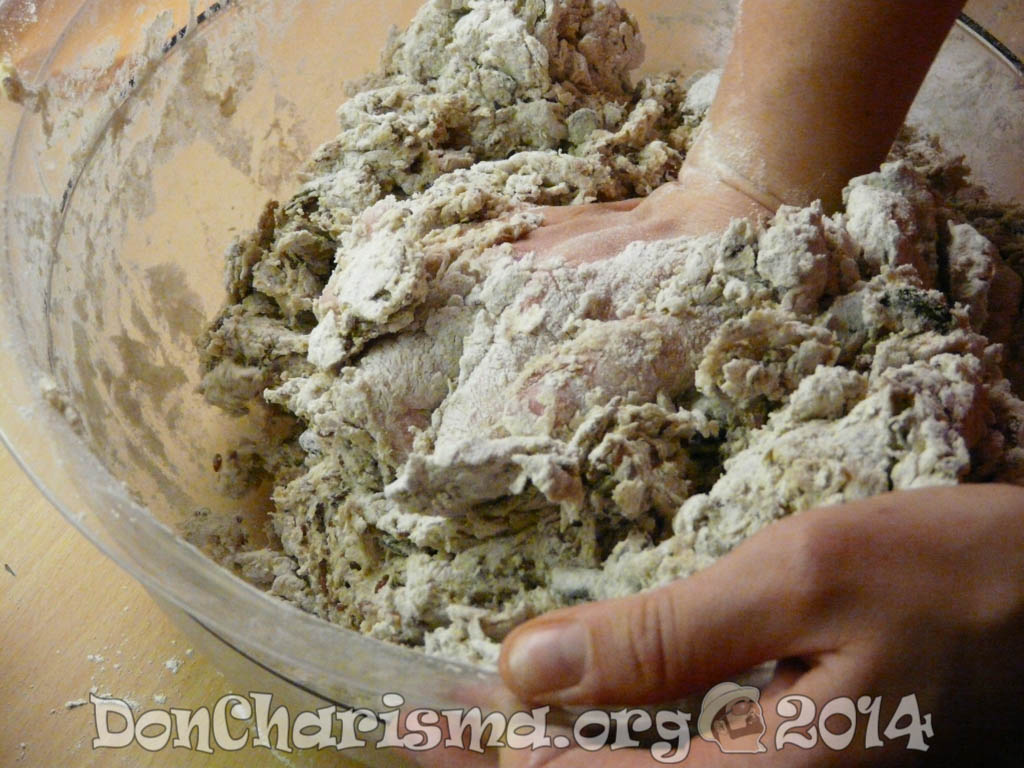
Step 1 – Make The Dough
First we make the bread “dough”.
Mix the flour and salt together. Add baking soda if you’re not using yeast, or the yeast if it’s dried fast acting kind (or nothing if you’re baking “unleavened” bread). Some people like to sift, I don’t bother, I just mix with fork. Then add water, and oil and milk if you’re baking with them. Do add the wet ingredients sparingly and slowly, it’s very easy to make a pancake mix if you add too much water or milk. Some yeasts will also be added with the liquids (sour dough and slower acting yeasts). Note that the dough may look a little too dry at first, but the moisture will spread with a little patience, don’t rush it.
You should end up with a dough that’s mixed fully and can be made into a fairly neat ball shape. It should still be dry enough that it’s not all that sticky on your hands, and definitely doesn’t “drip” through your fingers. If it’s too wet, add some more flour, sparingly until it’s the dough ball it ought to be. Too dry add a little water, but very little at a time, easy to go from one extreme to the other. With practice you’ll know what the optimum consistency of dough is. In any case think of Italian pizza chefs throwing and spinning the dough, and how it would need to be to do that 😀
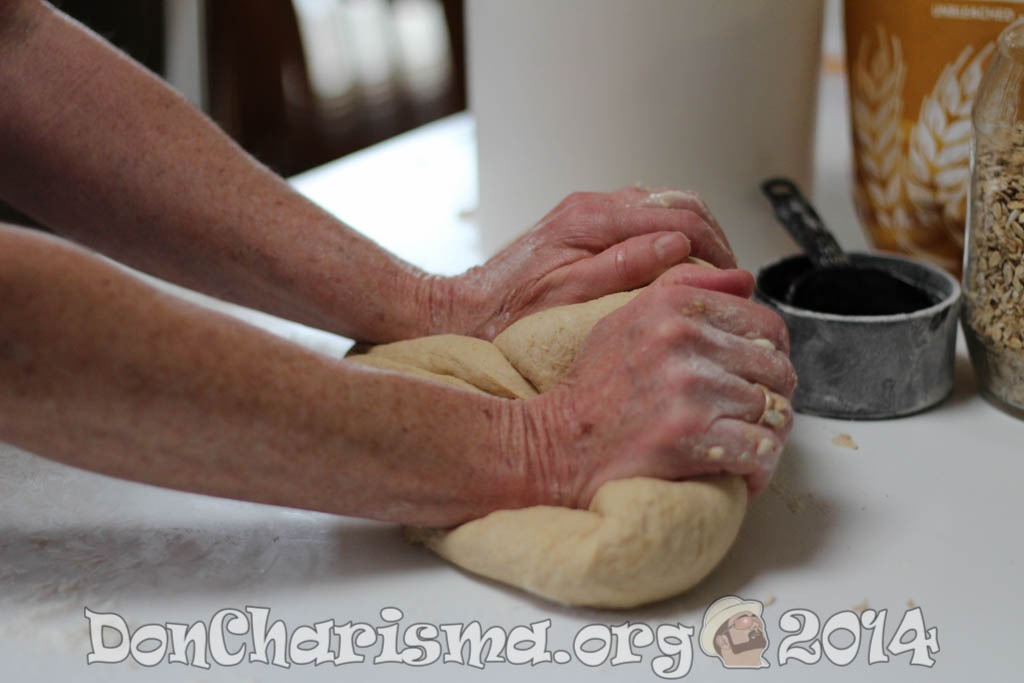
Step 2 – Kneading The Dough
Next we need to “knead” the dough for around 5 minutes. My understanding of this process is that it gives a chance for the ingredients to “fully” mix, that is the water to properly and evenly combine with the flour. We kneed the dough by working it with our hands, a little flour sprinkled on a chopping board or a (very clean) worksurface, and a little on your hands. Try not to work too much additional flour into the dough, and basically it’s just “working” the dough by pushing it into and out of a ball shape. As you get more experienced you’ll discover you can man-handle it a little. Kneading with a clenched fist works well, especially if you’ve some inner tension that you want to inflict on something 😀
For small amounts of dough I knead my dough just in my hands without putting it down, which saves washing up, bonus !
Step 3 – Resting The Dough
Prior to cooking the dough needs to “rest”, usually around 8-15 minutes. Form into a ball and leave the dough to rest.
Step 3a – Rising The Dough (Not required if cooking without yeast or unleavened bread)
If you’re cooking with yeast you’ll need to “rise” the dough, and in this case the resting can be combined with the rising. For rising the dough, it needs to go into it’s cooking container, which is greased or non-stick (because bread loves to stick to whatever it can). Might be a bread tin, and it may need to be covered with a cloth depending on how long it’ll take to rise the bread. For fast acting yeasts, this might be as short as 15 minutes (so might not need to cover), for sourdough it could be hours rather than minutes (definitely need to cover). The cloth is put to cover the dough so that it doesn’t dry out, and may also prevent insects, domestic pets or other undesirables getting to it whilst it’s rising.
Rising should be done in a “warm” place, this will accelerate the rising process. What I mean by warm place is somewhere it’s a summery kind of temperature, a very very low oven if it goes this low for instance. If it’s too hot, you’ll kill the yeast and it won’t rise. If you live in the tropics like me, then it’s room temperature pretty much all year round !
Rising should probably involve an element of “by eye” too, no sense in leaving it for 2 hours if it’s fully risen in 15 minutes. So generally speaking dough will double in size during rising, but this will depend on the yeast, the flour and the temperature your working with, so impossible to say exactly, could be more or less 😀
Step 4 – Baking / Cooking The Bread
For standard baking bread in a bread tin, it’s a hot oven and baking takes a fairly short time, around 10-15 minutes. Bread flour packets often have a recipe on the back, or check the internet for temperatures and baking times. I always apply some common sense to this, so check it early (maybe it’s cooked already), then at the time I think it should be done, check again. If it’s anaemic looking on top and hasn’t browned then it probably needs cooking a little longer. So keep an eye on it, that’s how I cook and never burn things. But don’t keep opening the oven every 30 seconds, as I believe you can “sink” your bread, if you keep on letting the heat out of the oven in this way.
My Flatbread Recipe
I don’t have an oven where I live. Microwave bread, don’t know of a recipe for that, but never say never !
I have a hob with two rings and a frying pan with a lid that covers pretty well borrowed from a large saucepan. I researched recipes for flatbreads, naan breads, Navaho style fry-bread and some others that came up. I found it’s entirely possible to cook bread in a frying pan or indeed on a barbecue, well according to Jamie Oliver if you believe him …
Ingredients
- Approx 1 cup Strong/Bread Flour, White (I actually use 3 x 70ml scoops, which slightly less than 1 cup by volume)
- 1 teaspoon salt (or less/none if you prefer)
- 1/2 teaspoon baking soda/baking powder (or more maybe 1 teaspoon if you like a sodabread type taste)
- SOME water (or milk works just as well, might improve the flavour, or you can combine half and half)
- Olive oil or cooking oil of your preference
Directions
Mix the Flour / Salt / Baking soda in a large bowl with a fork until they seem to have mixed together evenly, 30-60 seconds.
Add the water and/or milk, and perhaps a dash of oil. Start mixing with the fork and switch to combining the dough with your hands when it’s almost mixed. Form a ball of dough. If you’ve added too much water, and it’s batter’ey in consistency, then add some flour. If it’s too dry and wont form together in a ball, then very small amounts of water until it’s a nice dough consistency.
Lightly dust with flour a surface such as a chopping board. Spread the dough into disc shape approx 1cm (between 3/8 and 7/16 of an inch) thick. Thickness isn’t critical, but too thick and it may not cook through and too thin you might find it difficult to transfer into the frying pan ! Don’t be afraid to experiment, maybe you’ll have a positive discovery and it’s better than how I do it …
Leave to rest, around 8-15 minutes. In the meantime you can be preheating the frying pan (with the lid on) on your hob.
Cooking temperature should be fairly hot, but not too hot. If the oil burns and you have smoke, then it’s far too hot ! … I’m vague about the temperature because the bread will cook at a lower heat, it will just take longer. Also my hob, frying pan and lid will be different from yours, so you need to play it by ear, same as I do … be adaptable in baking …
Best to cook (or should I say bake !) with non-stick frying pan with a little oil, or if it’s not non-stick you’ll need more oil, as bread loves to stick to things. Not too much oil, or you’ll end up with a bread that’s more fried than baked. Place the dough disc in the center of the frying pan, and cover with the lid. Cooking time will vary, mine was between 10-15 minutes, yours will likely be different. Gently touching the top of the bread with a spatula will reveal if the bread has a crust or not. If it has a crust you can probably use the spatula to lift the bread (it’s quite rigid) and see the colour of the base, light or golden brown is fine, it’s probably cooked. If it’s dark brown or has dark brown patches, then it’s almost certainly cooked. Black you’ve left it too long and it’s starting to burn or you’re too high on the heat. Turn the bread over, replace lid and cook the “top” of the bread for a few short minutes, just to make sure.
Place out of the frying pan onto a wire-mesh grid to let it cool … a bit !
Serving Suggestions
Cut into strips and dip into humus.
Or perhaps cut the bread into squares. Top with avocado and mature English cheddar. Sprinkle a touch of balsamic vinegar for an extra dimension.
Or the first one I cooked just ate in squares with melted butter, yummy 😀
Or whatever floats your boat really, it’d be boring if we were all the same …
Enjoy !
Improvements
I want to try my above recipe with fast action yeast, so if I can’t get it fluffier and without soda taste. Also I want to try and make my own sour dough culture and use in the same recipe.
Outro
Some people skim summaries to “bottom feed”. So for you guys, what’s above is the pre-requisite knowledge of bread making, followed by how to make bread in 5 steps and then a recipe to make actual bread without an oven. It’s not mean’t to be a complete guide to baking, more a rough guide.
I reckon the ability to cook simple stuff like bread is one of our basic life skills – I can’t imagine why anyone would think baking or cooking is demeaning, I thoroughly enjoy it, as does my waistline … and my pocket, it’s cheaper to cook it at home 😀 Only downside is it takes a little bit of time, so I’m sure my local French bakery, who are excellent, won’t go out of business just yet.
Comments are invited
Comments are often welcomed, provided you can string a legible, relevant and polite sentence together. In other cases probably best shared with your therapist, or kept to yourself.
Resources & Sources
Photos courtesy Pixabay.com CC0 / Public Domain


Writing in such simple language is indeed an achievement past compare. Each of your pages have something different to tell. Liked them all.
very kind I do my best to impress 😀
I’ve been a bread maker for about a million years, so I know this is a great post! Was interested in your comments about salt. I rarely use salt when I’m cooking anything, and have tried baking bread without it. It does affect the flavor (and other things as well), so what I usually do is use half the salt the recipe asks for. Or a little less.Some of the more technical info is here:
http://www.kingarthurflour.com/professional/salt.html
LOL that’s about 999990 years longer than me then 😀
I limit the salt, but yes does make a difference and probably improves the bake … I’ve been experimenting with sourdough, and really honestly my conclusion is the best tasting bread is made with sourdough … maybe I’ll post about it !
Don, I love making bread (never used a bread maker). I will be trying yours tomorrow, but ahead of that I wanted to share with you a recipe that is made solely in a frying pan, it is for Greek Pita. If you need/prefer it converted to weights then let me know.
3/4 cup warm water
1 tablespoon active dry yeast
1 teaspoon sugar
2 tablespoons extra virgin olive oil
1 teaspoon salt
3 cups all-purpose flour
cornmeal (for dusting)
olive oil (for cooking)
In a large bowl, combine the water, yeast and sugar and let stand until you see that the yeast is active.
Add olive oil and, salt.
Using your hands, gradually add the flour into the wet and knead until the dough pulls away from the sides of the bowl.
Cover and leave in a warm area to rise and rest for about 30 minutes.
Divide into six pieces and roll into an 8 or 10 inch circle, about 1/4 inch thick.
Dust both sides lightly with cornmeal.
Place a heavy cast-iron skillet, non-stick pan, or griddle and heat to medium-high.
Wet a paper towel with olive oil and grease your hot skillet.
Place your pita dough in the skillet and and fry the bread for a couple of minutes until they start to puff and bubble up (kind of like pancakes).
Flip and fry the other side.
Place cooked pita bread on to a large cotton kitchen towel and cover.
Re-oil the skillet and repeat for each pita.
Serve warm or allow to cool inside the kitchen towel until cooled.
Store in a sealed plastic bag for up to a week or freeze.
Thanks for recipe, and useful to compare notes, helps to refine what I’m doing 😀 … the corn-meal gives a lovely outside, not sure where I can buy here will have a look 😀
Got myself a proper rolling pin yesterday, dunno how I managed without it before !
The main purpose of fhe cornmeal is to lower sticking wihtout using oil.
My husband makes the bread in our house. He uses the bread maker to do all the hard kneading stuff and lets its rise, then tips it our, gives it a quick knead, onto a baking tray and into oven. No two loaves are ever quite the same as he delights in experimenting with adding seeds, flakes and toppings. Would never buy bread now, except occasionally I buy German rye bread.
LOL, yup, I wouldn’t know where to start making pumpernickel bread, at least I think that’s what the whole grain rye bread is called …
My bread maker is semi-retired and lives in London, so I have to do by hand … soda is great for quick and easy, but taste wise not the same as yeasts … and you’re definately right, every loaf is different … my twist is that I don’t have an oven, so it’s “baked” in a frying pan … last couple of bakes have come out almost like crumpets !
I used to make bread in a bread maker but got rid of it because the bread used to go hard very quickly and there was always this damn hole in the bottom caused by the breadmaker’s mixing blade.
I don’t eat a lot of bread these days at all but enjoy it as a treat from time to time. I have a recipe here for Beer Bread that I want to try though.
Yes, have a “retired” bread machine myself back in LOndon … the hole is a shame … as for it going off, slice it and freeze it, use it slice by slice when you need it … that’s what I do when I buy bread, otherwise I’d waste money on mouldy bread …
Beer bread sounds like a treat, I’ll perhaps try a Change or a Singha or a Leo in a bread in the near future … probably right about the bread not being particularly good for us, I’ll probably switch once I’ve perfected my frying pan baking technique, want to see if I can cook a pizza from start to finish with no oven first … in the meantime the waistline will suffer, I guess !
I need to bookmark and save this. I make bread in my breadmaker and also out of it, but like your explanations. Once I knew what ingredients are part of the dough conditioner in store purchased bread, I became a fan of making my own. And there is a plus with the smell in the house of fresh baked bread. 🙂 Thanks for sharing.
You’re welcome … I also own a bread maker back home in London, and learnt a lot from using it … nothing like getting one’s “hands dirty” though, and experimenting, perfecting 😀
Yummy! Congrats on such a delicious looking bake! =D
Thanks 😀
I make homemade bread at least once a week, although my 22 yr old son prefers those old Stroeman Sunbeam King size loafs you get for $2.49! LOL (The same bread I grew up on by the way)
About kneading the bread Don… I push the dough away from me with the heel of both hands, then grab the end of the elongated dough and turn it 1/4 turn towards me at the same time I fold the dough towards me and push away again. Doing that repeatedly. I do at least 100-150 “turns” of the dough as I work in the flour and make it less sticky and soft. If I don’t work enough flour into the dough it tends to deflate a little when it rises the 2nd time in the loaf pans. Plus I make my dough the evening before I bake it and let it rise in the fridge a good 10 hours or more before dividing up the dough (yes I use a food scale- 24 OZ each), to knead out the bubbles and shape into loaves. It takes a good 3-4 hours to rise the second time.
I use good old All Purpose unbleached flour like Grandma used to do. She taught me how to make bread 40 years ago when I was about 15 years old. Plus I make 3 rows of deep fork marks in the dough like she used to do. (Probably ensuring there were no bubbles baked in the loaves.
LOL, not tried your son’s bread as I’m not in USA … but yes, when I buy bread it’s similar or more expensive price, which is a lot for what it is, really …
Thanks for adding your knowledge on kneading, you’re very patient making bread 😀
I started my sourdough culture yesterday, so hopefully I’ll be able to bake some sourdough flatbread in a few days, all things being equal …
Good luck with the sourdough, although that was one “pet” I didn’t enjoy feeding! LOL I used a 3 day sponge instead when I made my Milwaukee Rye.
It’s started and frothing away nicely, don’t know if it’ll need the 3 days, 2 days might be fine here in the tropics … I’ll see how I get on, I don’t mind experimenting !
Reblogged this on meanlittleboy2 and commented:
man has to have some bread!!
Thanks for the reblog 😀
This is the most thorough bread-making recipe I’ve ever seen- and it’s awesome! I have failed as many times as I’ve successfully baked my own bread. Yours looks delicious 🙂
Thanks, I like to do things my way, learning about the ingredients is most important I find … and yes I’ve had plenty of failed attempts at making bread too, each time I learn something 😀
You indeed are a man of many talents! I’m longing for home made bread just reading this. 🙂
LOL, thanks, very kind … hope you get some soon !
I love making bread but have never tried flatbread. Your recipe looks simple & the bread looks great so I’m going to try making it this week. Thanks. 🙂
Thanks, and yes, very simple food, best way for food to be … have fun 😀
Reblogged this on . . . We All Are The Universe..
Thanks for the reblog 😀